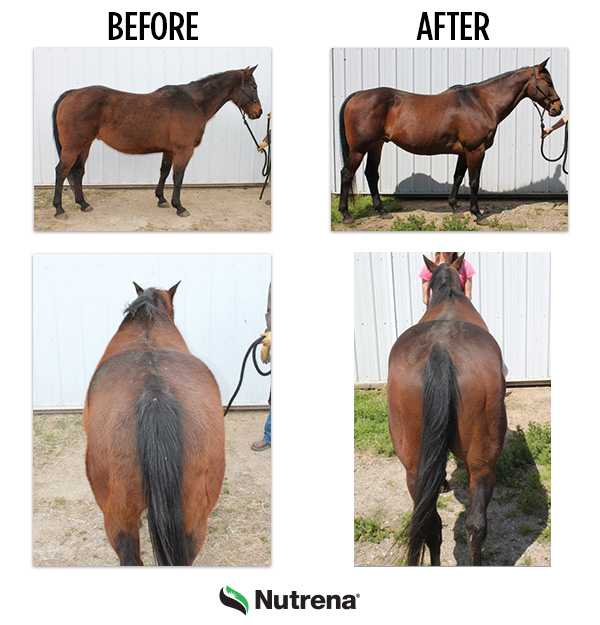
How to Take a Photo of Your Horse’s Topline
If you’ve ever tried to photograph your horse, you know it can be challenging at times! It takes a lot of patience, time and a little luck. But capturing photos of your horse, especially ‘before and after’ ones, can be very rewarding. It’s exciting to see the progress made from a new feeding regimen, new product or new routine. So to make the task a little easier, we’ve compiled some go-to tips:
- Be safe! Plan plenty of time, patience and have a trusted helper.
- Use the same plain colored backdrop for each photo (a plain colored door of a barn, garage door, etc).
- Be sure your lighting is bright and consistent every time.
- Be sure you are standing at the same distance every time.
- Be sure that the horse is groomed, and standing square with their poll at the same height for both before and after pictures.
- Try to minimize distractions, crop out the handler, like in the €˜after’ photo below.
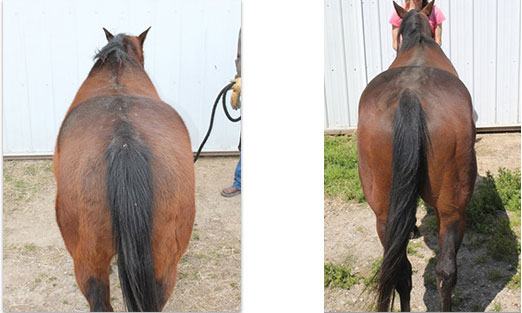
- Take a posterior photo to show muscle improvement
- Square the horse up.
- Stand on a stool to be sure you get the right angle.
- Be safe, stand a safe distance behind the horse.
- Keep your backdrop and lighting consistent.